☁️ External Cloud Storage (rclone)
Connect external cloud accounts — including ProtonDrive, WebDAV (Nextcloud, ownCloud, Hetzner Storage Box), and other rclone-compatible remotes — directly to your On My Disk Linux node so they appear alongside your local shares over P2P.
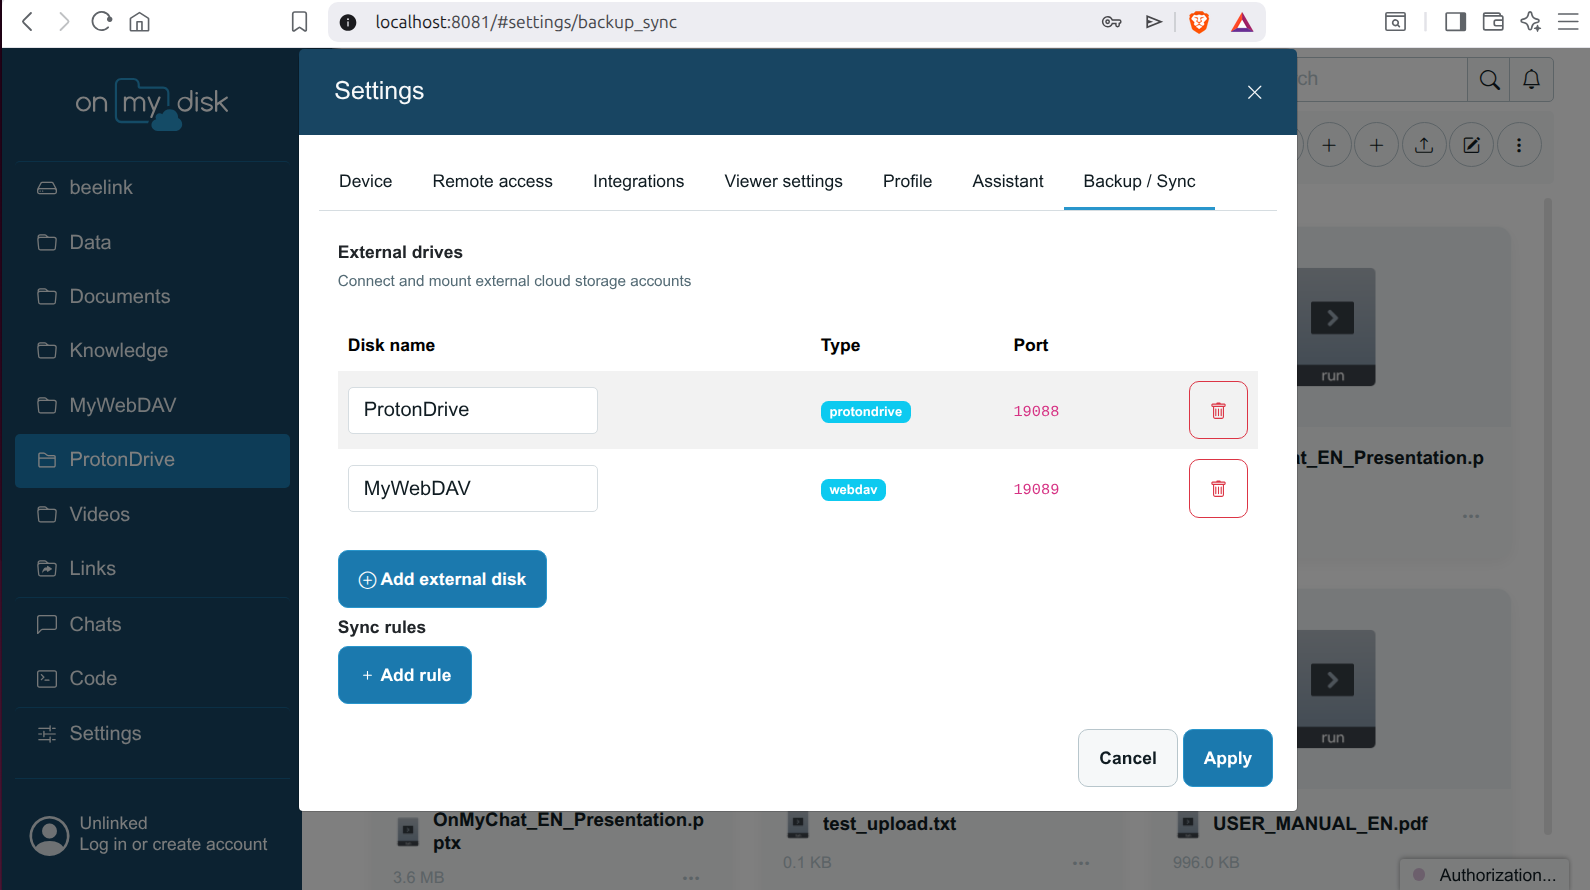
Step 1: Install rclone on Your Node
Install the official rclone binary on your Linux host:
sudo -v ; curl https://rclone.org/install.sh | sudo bash
Everything else — remote configuration, password obfuscation, and process supervision — is managed automatically by your On My Disk node.
Step 2: Add an External Disk in Device Settings
- Open the On My Disk Web App, select your Linux node in the sidebar or workspace, and open Device Settings → External Storage / Backup.
- Click + Add external disk and fill in the fields:
| Field | Description |
|---|---|
| Disk name | Display name of the share (e.g. ProtonDrive, OfficeNAS) |
| Type | ProtonDrive or WebDAV |
| URL (WebDAV only) | WebDAV endpoint URL (e.g. https://cloud.example.com/remote.php/dav/files/user/) |
| Username | Account username |
| Password | Account password or app token |
| Port | Local loopback port for the WebDAV bridge (auto-assigned starting from 19088) |
- Click Save / Apply.
Step 3: Automatic Lifecycle Management
When applied, the node automatically:
- Writes or updates
~/.config/rclone/rclone.conf(obfuscating credentials viarclone obscure); - Supervises
rclone serve webdav <name>: --addr 127.0.0.1:<port> --vfs-cache-mode writes; - Publishes the mounted cloud drive in your device’s sidebar tree over P2P (and stops the
rcloneprocess cleanly whenever a disk entry is removed).
For advanced custom providers (S3, Google Drive, OneDrive, Dropbox), configure the remote in
~/.config/rclone/rclone.confusing the official rclone documentation.